Step 1: Make a Selection
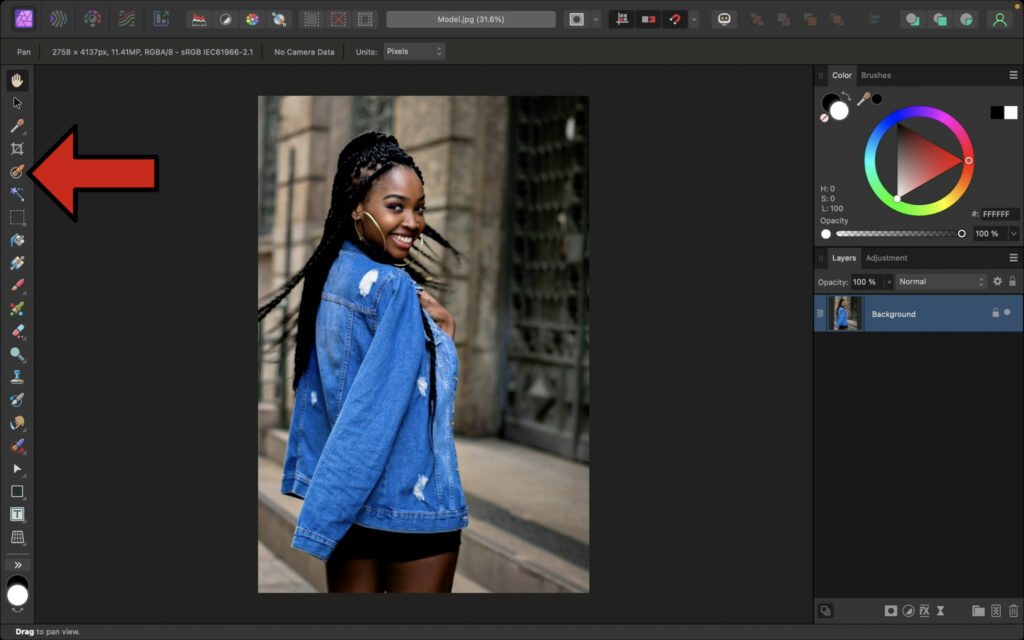
Select the Selection Brush Tool.
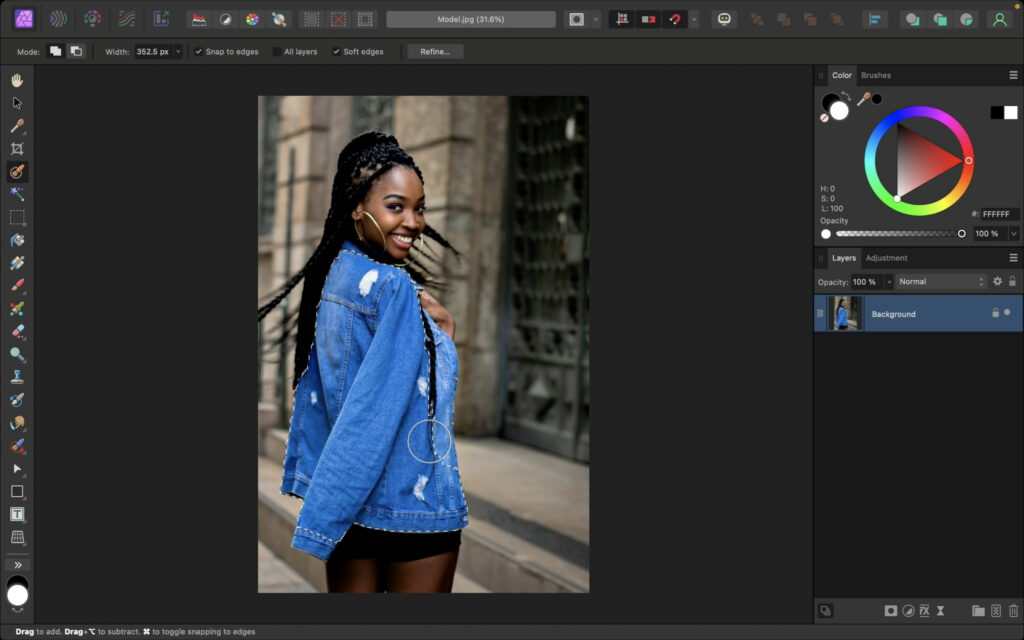
Click and drag to make a selection of the object that you want to change.
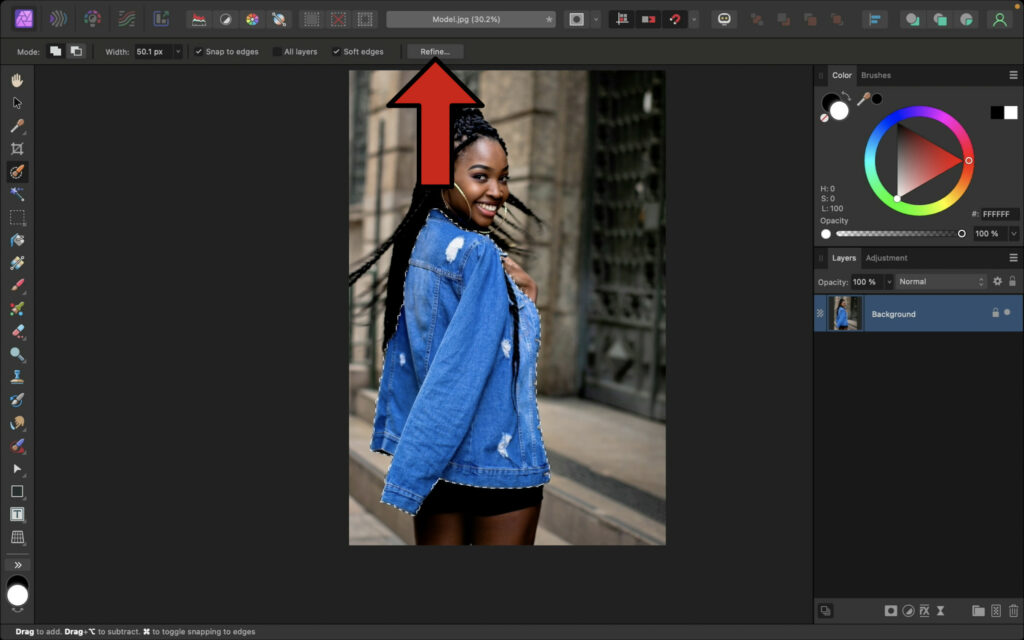
Press Refine.
Press Apply.

Step 2: Change the Base Color
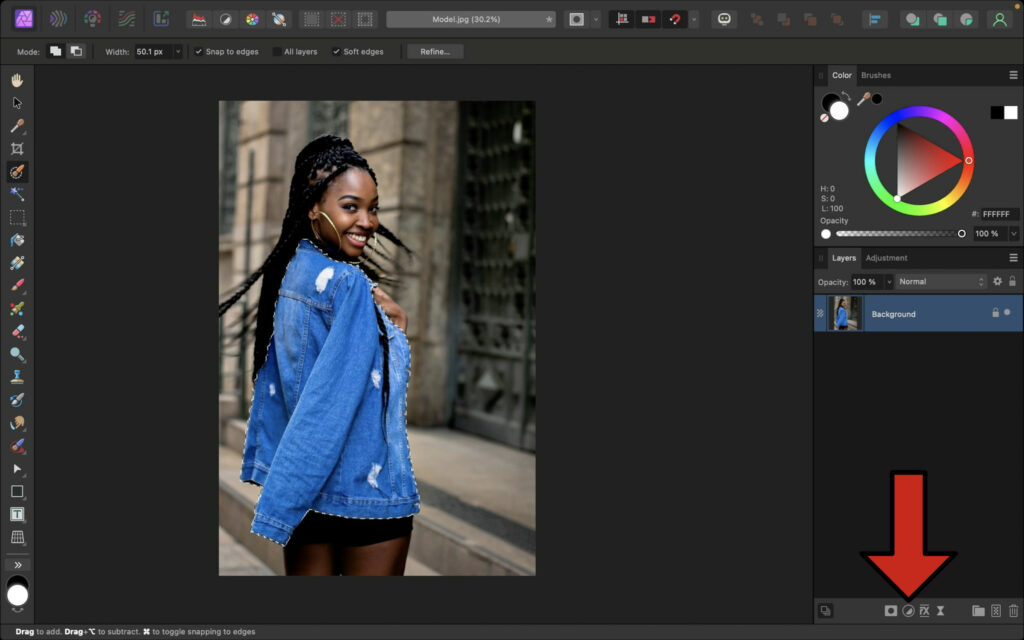
Apply an HSL adjustment.
Adjust the Hue slider to change the color. Adjust the Saturation to change the intensity of the color.
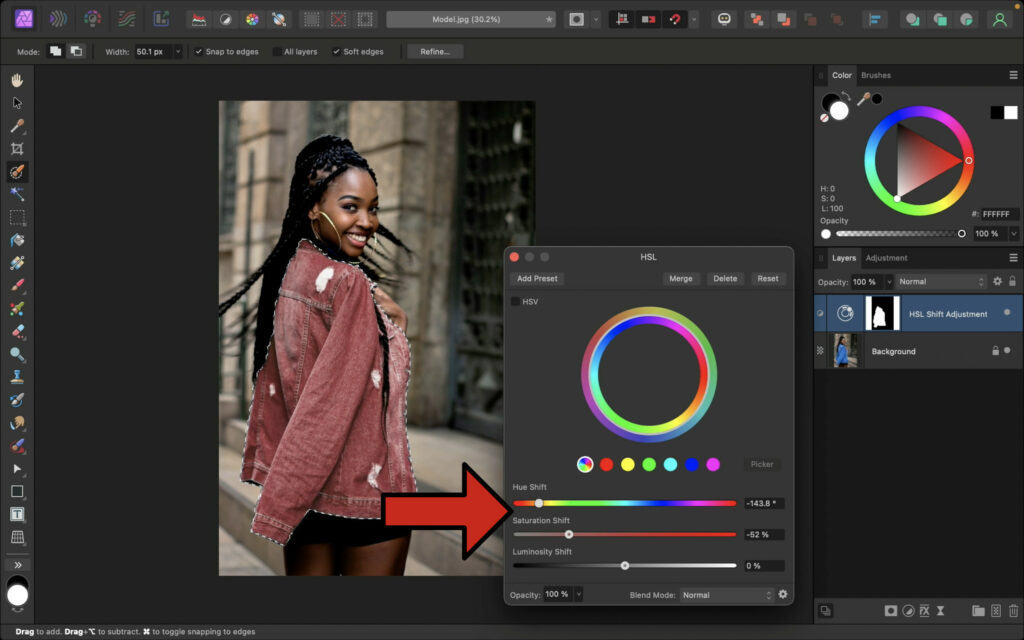
Deselect the object by pressing Control + D (PC) or Command + D (Mac).
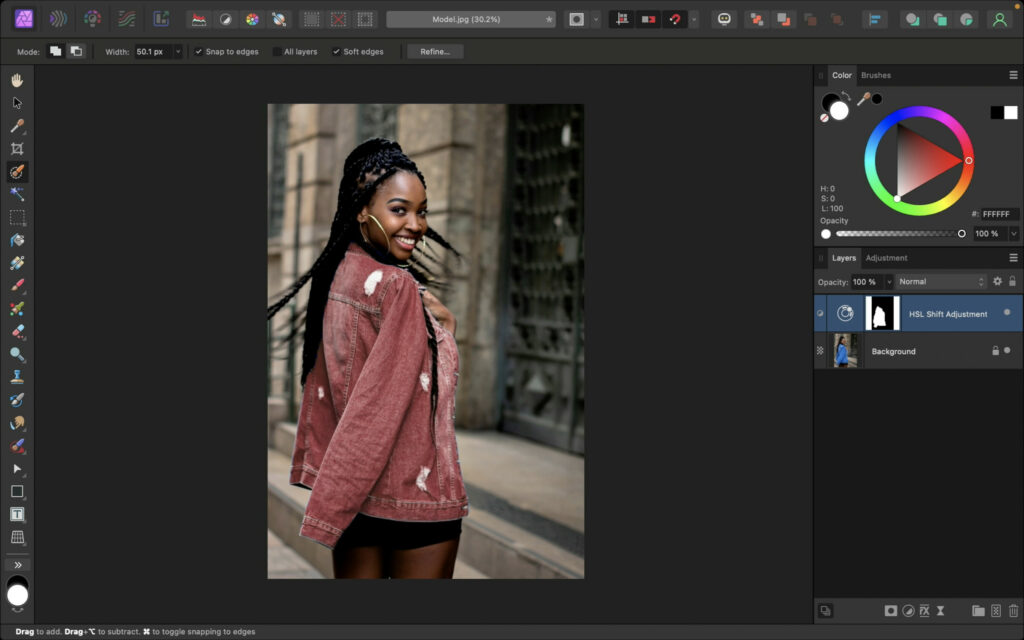
Step 3: Clean Up the Edges
Most of the object is changed to the right color. But sometimes when you change the color, you might see fringing left behind from the original color.
Add a new pixel layer.

Change the Blend Mode of the layer to Color.

Select the Paint Brush.

Using the Color Picker, click and drag until you are hovering over the new object’s color.

Click on the sampled color to apply it to the brush.

With a low Flow and 0% Hardness, paint this color over the edges of the object.

Step 4: Try Other Colors
With all of this set up, it’s easy to change the color again.
Click on the HSL adjustment’s layer icon.

Adjust the Hue and Saturation as desired.

Now the edges don’t match the new color. To fix this, apply an HSL adjustment.

Click and drag on the new HSL adjustment on top of the Pixel layer. This will make it a child layer.

Adjust the Hue and Saturation of the Pixel layer until the color looks similar to the rest of the object.

And that’s it! Now you know how to change colors in Affinity Photo. 😊