Welcome to Affinity Publisher! In this article, we will cover the top 10 things beginners need to know. Let’s get started! 😊
#1 – Document Setup
Go to the File menu, then select New.

Over on the left, Affinity has presets for common document sizes.

Instead of using a preset, you can customize the settings. First, in the Layout section, you can change the document units, and the page width and height.

You can also change the Image Placement from Prefer Linked to Prefer Embedded. This makes it easier to add images to your document.

In the Pages tab, you can choose if you want Facing Pages. With Facing Pages, your document will be organized with two pages facing each other, just like books and magazines. Without Facing Pages, each page will stand on its own, just like when you print something on a home computer.

You can also change the number of pages in your document.

In the Color tab, you can change the Color Format of your document.
RGB is for anything that will be shown on a computer screen or printed on a home computer. CMYK is for anything that will be printed with a commercial printing shop.

In the Margins tab, you can see a preview of what the margins will look like. Common margins are 1 inch on the top and sides, with 1.25 inches on the bottom.

In the Bleed tab, keep all of these values set to zero. Bleed isn’t something beginners need to worry about. With that all set up, press Create.

#2 – Interface Overview
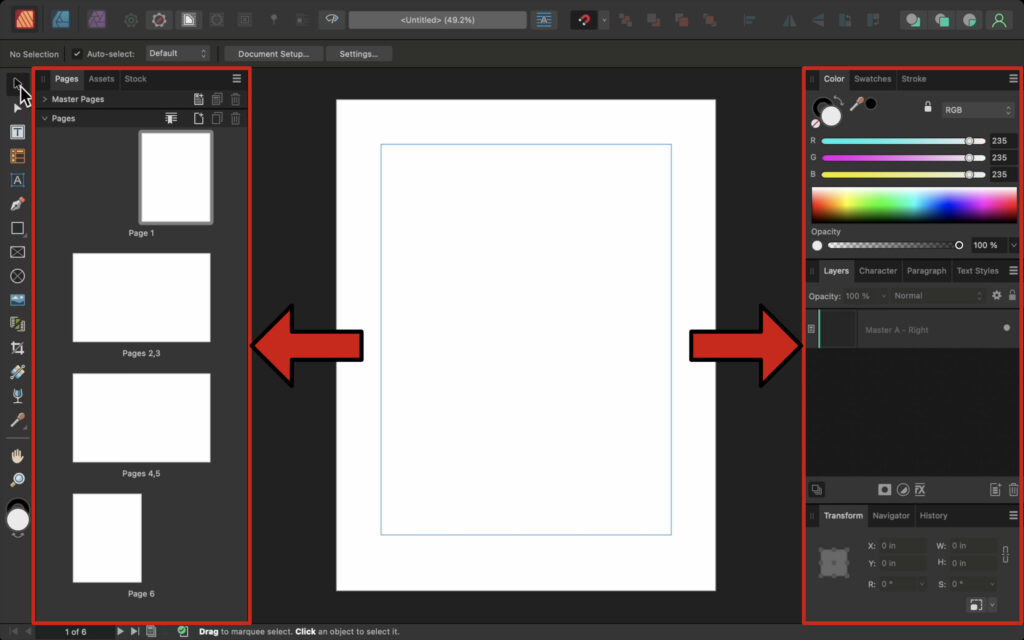
The interface is organized into three main areas: the Tools on the left, the Context Toolbar at the top, and the Studio Panels on the right and left.

The Context Toolbar changes every time you select a different tool.

There are around 30 different panels in Affinity Publisher, and they offer a wide range of functionality. By default, Affinity hides the less important panels.

In fact, you don’t need all of the default panels. To remove a panel, click and drag on its name and then press the X to delete it. Remove the Stock panel, the Assets panel, the Transform panel, the History panel, and the Navigator panel.

If you ever need to bring back a panel, go to the Window menu, then click on the name of the panel.

Or, if you want all of your panels to go back to the default, go to the Window menu, then Studio, then Reset Studio.

You can customize the panels by opening the hamburger menu at the top right of the panel.

With the Color panel, select the Wheel option to change from sliders to a color wheel.

#3 – Artistic Text
Select the Artistic Text Tool.

With this tool, click and drag to make a text box, then type whatever you want.

If you want to make another text box, just click and drag to make a new one.

To format the text, select the Move Tool.

To format the first text box, click on it to select it. Then in the Context Toolbar, you can select a new font.

You can change the font size from the Context Toolbar, or you can click and drag on the text box to resize it.

You can adjust the other text box by selecting it and changing the font and size.

You can move both text boxes to the center of the document. If you don’t see lines to help you line up the text, turn on Snapping by clicking on the red magnet.

If you ever want to remove a text box, there are two ways to do this. First, turn off its layer by pressing on the little circle to the right of the layer in the Layers panel.

If you want to completely delete the text box, click on its layer to select it, then press Backspace (PC) or Delete (Mac) on your keyboard.

#4 – Frame Text
Select the Frame Text tool.

To add text to the next page, double-click on Page 2.

Click and drag to make a text frame.

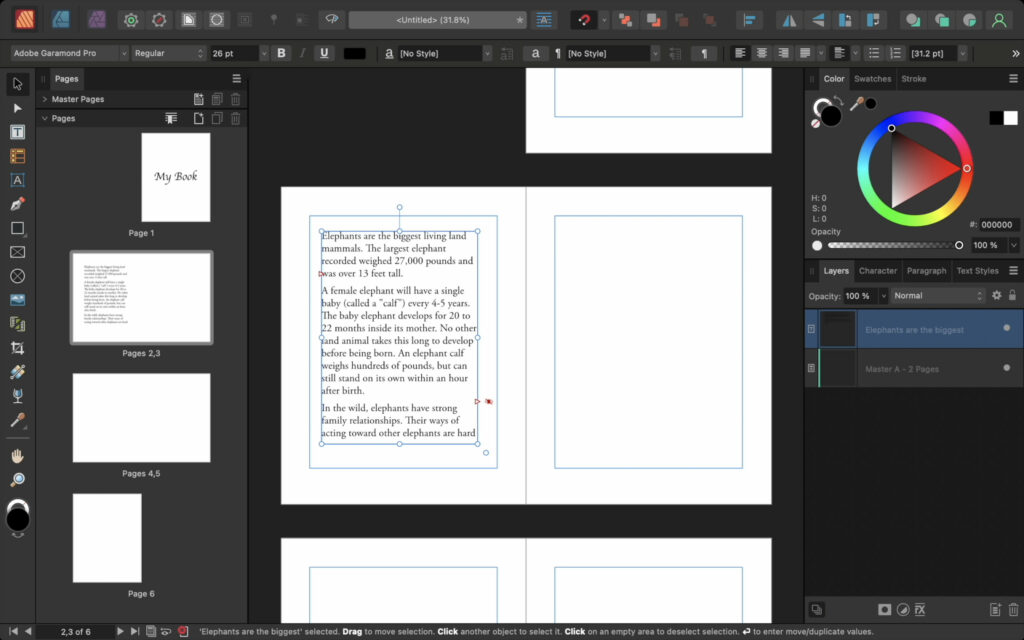
Unlike the Artistic Text tool, the Frame Text tool is designed for large amounts of text. You can type as much as you want.
After typing, you might not be able to see everything that you wrote. That is indicated by the red icon at the bottom of the text frame. The icon means there’s more text in the frame than what’s being shown.

Click and drag on the text frame to make it bigger.
Now all of the text is visible, but you probably noticed the text didn’t get bigger. Unlike the Artistic Text tool, the Frame Text tool will resize the frame independently of the text.

You can format the text in the Context Toolbar. To select the text, click and drag to highlight all of the text.
Or, you can use the Move Tool to select the whole text frame. With the Move Tool, you can change all of the text in the frame without needing to highlight anything.

With a bigger font, the text is being cut off again. Since this frame is already taking up most of the page, you can’t just make the frame bigger. Instead, you need to make another text frame that’s connected to this one.

To do this, press Control + 0 (PC) or Command + 0 (Mac) to perfectly fit both facing pages to your screen.

Click on the red output arrow at the bottom of the text frame.

Click and drag to make a new text frame, and it will automatically be connected to the original frame.

If you continue typing, you’ll see that the text at the bottom of the first frame automatically flows to the top of the next frame. That’s what happens when you have multiple text frames connected together.

#5 – Placing Word Documents
Go to a new page by double-clicking on it. Then, make another text frame that is the same size as the document margins.

To add a Word document, go to File, then Place.

Select the document from your computer, and press Open.

The Word document is instantly loaded into the text frame.

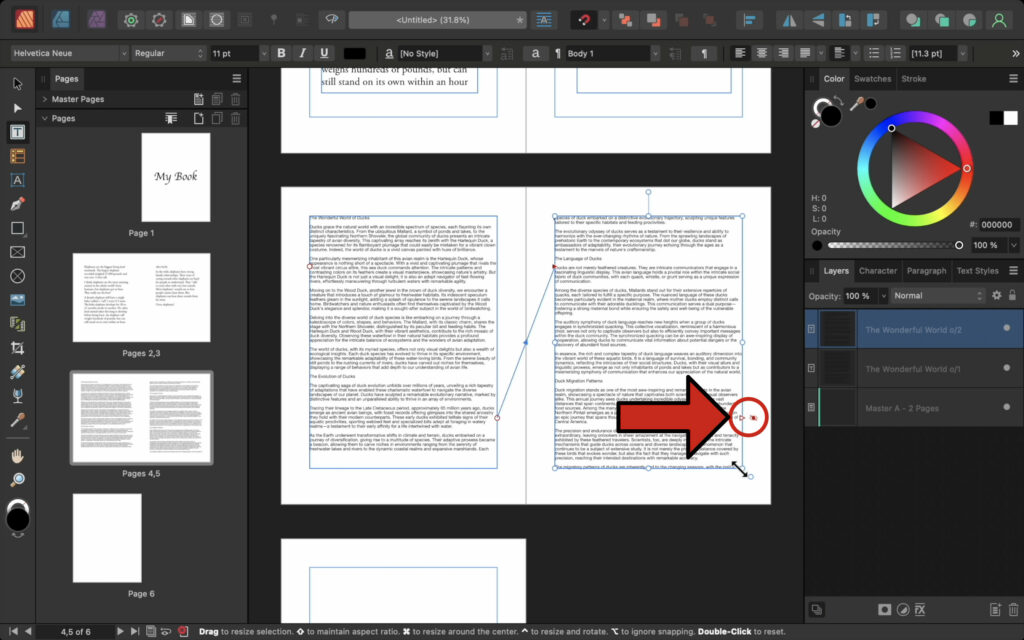
This single frame isn’t big enough to show all of the text. Once again, press Control + 0 (PC) or Command + 0 (Mac) to see both of the facing pages. Then click on the output arrow.

Click and drag to make a connected text frame.

Even with another text frame, there isn’t enough space for all of the text. You could make more text frames, but there’s actually a faster way to do this—you can use a little feature called Autoflow.
Autoflow will duplicate a text frame over and over until there are enough frames to fit all of the text. To use Autoflow, hold down Shift, then click on the output arrow.

Now, all of the text is inside the text frames. Autoflow even made an additional page to make room for the fourth text frame.

With all the text visible, we can format it. Click anywhere in one of the text frames, then press Control + A (PC) or Command + A (Mac) to select all of the text. Then, format it in the Context Toolbar.

#6 – Text Styles
Text styles are presets for your paragraphs, and they can be updated at any time.
For example, let’s say you’re working on a document with ten paragraphs. As you’re formatting the text, you decide that paragraphs 1, 4, and 9 should all have a cool-looking text style. Then, you format paragraphs 2, 3, and 7 to have a cute-looking text style. Finally, paragraphs 5, 6, 8, and 10 all get a classy-looking text style.

But then, you realize you want to change the cute-looking text to be pink. Luckily, this is easy to fix with text styles. Just make one of the paragraphs pink, and the others will automatically update. With long documents, this can save you a lot of time.

To use text styles, click anywhere in the paragraph that you want to change.

To apply a text style, open the drop-down menu. Apply the Body text style.

Text styles come with default formatting, but you can change that later. For now, apply the Body text style to all the other paragraphs on the page.

To speed things up, on the next page, press Control + A (PC) or Command + A (Mac) to select all of the text and then apply the Body text style to all of it at once.

You can apply a different text style to the section headings. To do that, click in the first paragraph. Even though this is a single line, it still counts as a paragraph, so we can apply a text style to it.

Then, apply the Heading 1 style. Continue to apply the Heading 1 style to all of the section headings.

With the text styles applied, you can change any of the paragraphs, and the other paragraphs with that style will also change. To begin, select the first body paragraph, then change the size and font.

To make the text go to the very edge of the text frame, press the Justify button. This adds additional spacing to the text so that it goes to both edges of the frame.

To apply changes to the rest of the body text, you need to update the text style. To update a text style, have your new text selected, then press the button right next to the text style drop-down menu.

Now, the rest of the body text has been updated.

You can do the same thing for the section headings. Select the first heading, then change the size, font, and color.

Update the Heading 1 style.

All of the text is updated, but there’s a small problem. On the last page, the red eye is back. Because the text is bigger, the text frames aren’t big enough to hold it all. To fix this, hold down Shift and then click on the output arrow.

#7 – Pages Panel
You can use the Pages Panel to make more pages. If you want to add more pages after page 5, click on page 5 to select it, then click on the Add Pages button.

Enter the number of pages, then whether you want it before or after the page you had selected, then press Okay to add the page.

If you ever want to rearrange the pages, click and drag to move them.

To delete a page, select it, then click on the trash can.

#8 – Adding Images
To add photos, select the Place tool.

Select the photos you want to add, then press Open.

Click and drag to place each photo.

After placing the images, Affinity will automatically select the Move Tool. With this tool, you can refine the size and position of all the pictures.

#9 – Master Pages
With a Master Page, you can make something one time, and then that element will appear on every page of your document. To use a Master Page, open the Master Pages section of the Pages panel.

Double-click on the Master Page. Anything that you add to the Master Page will appear on every other page of the document.

Select the Rectangle Tool, then click and drag to create a rectangle.

The rectangle only appears on half of the pages. This is because in the Master Page template, there are two pages. Anything added to the left Master Page will be added to the left pages in the document. Anything added to the right Master Page will be added to the right pages in the document.

To see this, add a rectangle to the right Master Page.
In the page preview, the red rectangle has been added to all the left pages, and the green rectangle has been added to all the right pages.

Now that you know how Master Pages work, it’s time to add page numbers. To delete these rectangles, hold Shift, then select both of their layers. Press Backspace (PC) or Delete (Mac).

To add page numbers, select the Frame Text tool. Click and drag to create a text frame at the bottom of the page.

To add a page number, right-click in the frame. Select Insert Field, then Page Number.

Affinity has added the correct page number on each left page.

To stylize the page number, select the Move Tool and click on the text frame to select it.

Center the page number, then center vertically from the drop-down menu.

Give the text a new color and a new font.

To add a page number to the other Master Page, duplicate this text frame. To duplicate in Affinity, select it with the Move Tool, then press Control + J (PC) or Command + J (Mac).

Click and drag to move the duplicate copy to the other page.

In the actual document, you can see the page numbers.

On the first page, it says page 1 on it. While this is technically correct, it would look better if the cover page didn’t have a page number on it.

On all the pages, there’s a Master Page layer in the Layers panel. If you don’t want the Master Page to be applied, just turn off that layer.

On the second page, it says page 2 on it. If you’d rather this say page 1, click on its page preview to select it.

Press on the Section Manager button.

Create a new section that restarts the page numbers. Starting on page 2, Affinity will restart the page numbering with 1.

As you can see, adjusting the page numbers is pretty easy.

#10 – Saving & Exporting
To save a photo, go to the File menu, then press Save As. This will save an Affinity file, which you can open later if you want to continue working on your design.

If you’re finished with your project, go to the File menu, then Export.

At the top of the dialog box, you can choose the file type that you want to use. There are a lot of options, but for this example, PDF makes sense.

Affinity gives options for customizing the PDF. You don’t need to worry about most of these options, but you can change the Area.
Right now, it’s set to Current Spread. A spread is what two facing pages are called, so this will only export the set of facing pages that you had selected. You can change this to All Pages to export the entire document.

Then, press Export. From here, you can save the photo onto your computer.

And that’s it! You now have all the foundational skills you need to work in Affinity Publisher. Great job! 😊